

A common first rung in a company’s product ladder is something free and informational. Something like a PDF whitepaper or other sales document. In the digital space, it’s easy to deliver this kind of thing. Potential customer’s can easily click and follow any link you include in a blog post or email they receive.
But why limit this product’s usefulness to digital sales and marketing? If you have a table at a trade show or are speaking at a conference, there’s no reason you can’t also share this sort of thing with booth visitors or audience members. Unfortunately, https://sternerstuff.dev/app/uploads/2016/12/Clair-de-Lune.pdf isn’t a URL you can easily share with people during a presentation or in passing at an event.
Instead, you’ll want to set up a very sharable URL that people can easily remember or write down. You also want to make sure your brand is included in this URL to maintain a professional appearance.
Here’s how.
Step 1: Put Your PDF in a Public Place Online
Anything you want to share online has to be uploaded somewhere, well, online. There are a couple options for this.
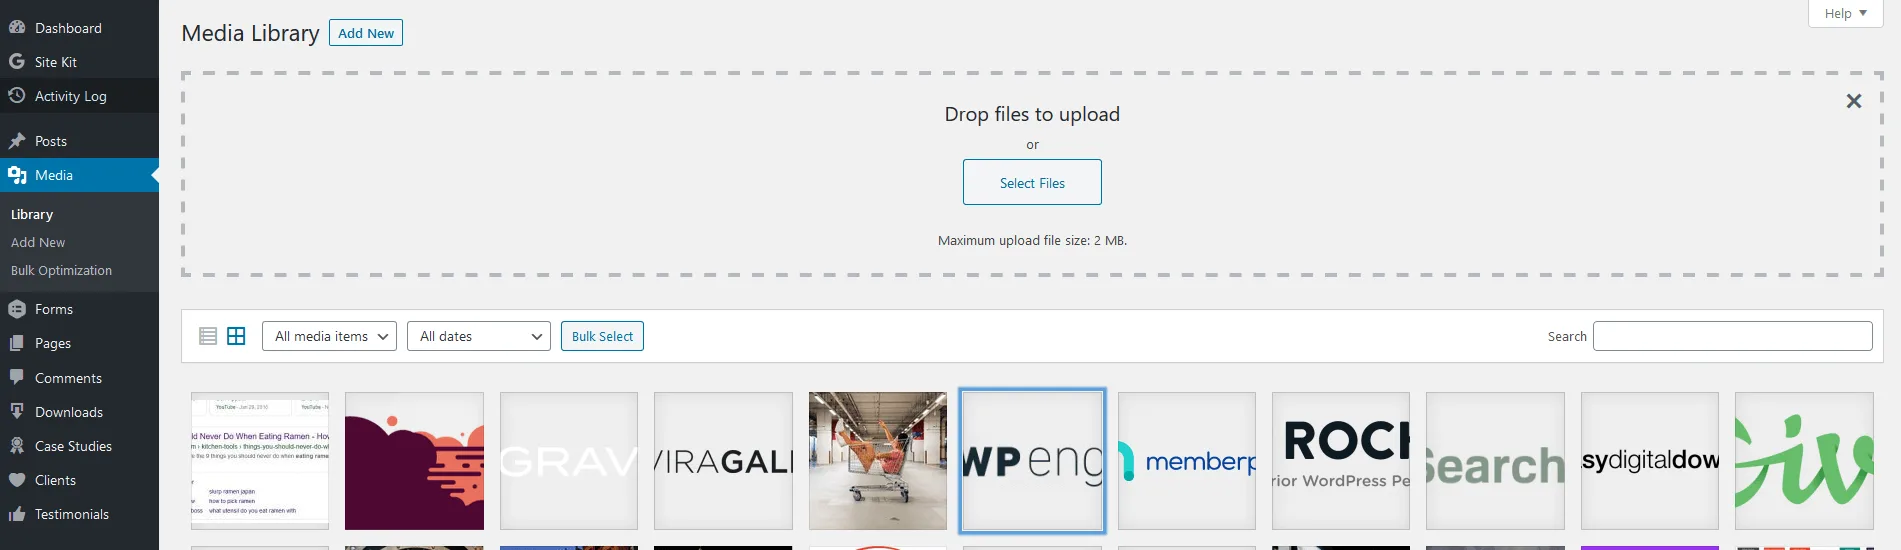
For something like a PDF, your WordPress site (if you have one) is actually a great place for this. Navigate to the media library that you normally use for photos and upload a PDF instead.
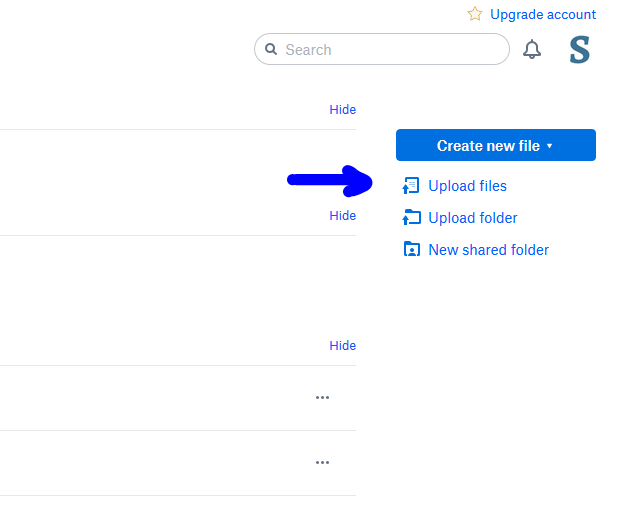
Another great option is Dropbox. Log into https://dropbox.com and on the right-hand side you’ll see where to add a new file.
Step 2: Get the URL to Share
By default, neither of these methods will give you a very memorable URL. WordPress URLs will include the year and date of upload, and the file name might be long. Dropbox will add all sorts of jibberish to the URL to ensure your link is unique from every other link Dropbox creates.
But we need that URL for our next step.
For your WordPress upload, click on the PDF in the media library and copy the link from the popup.

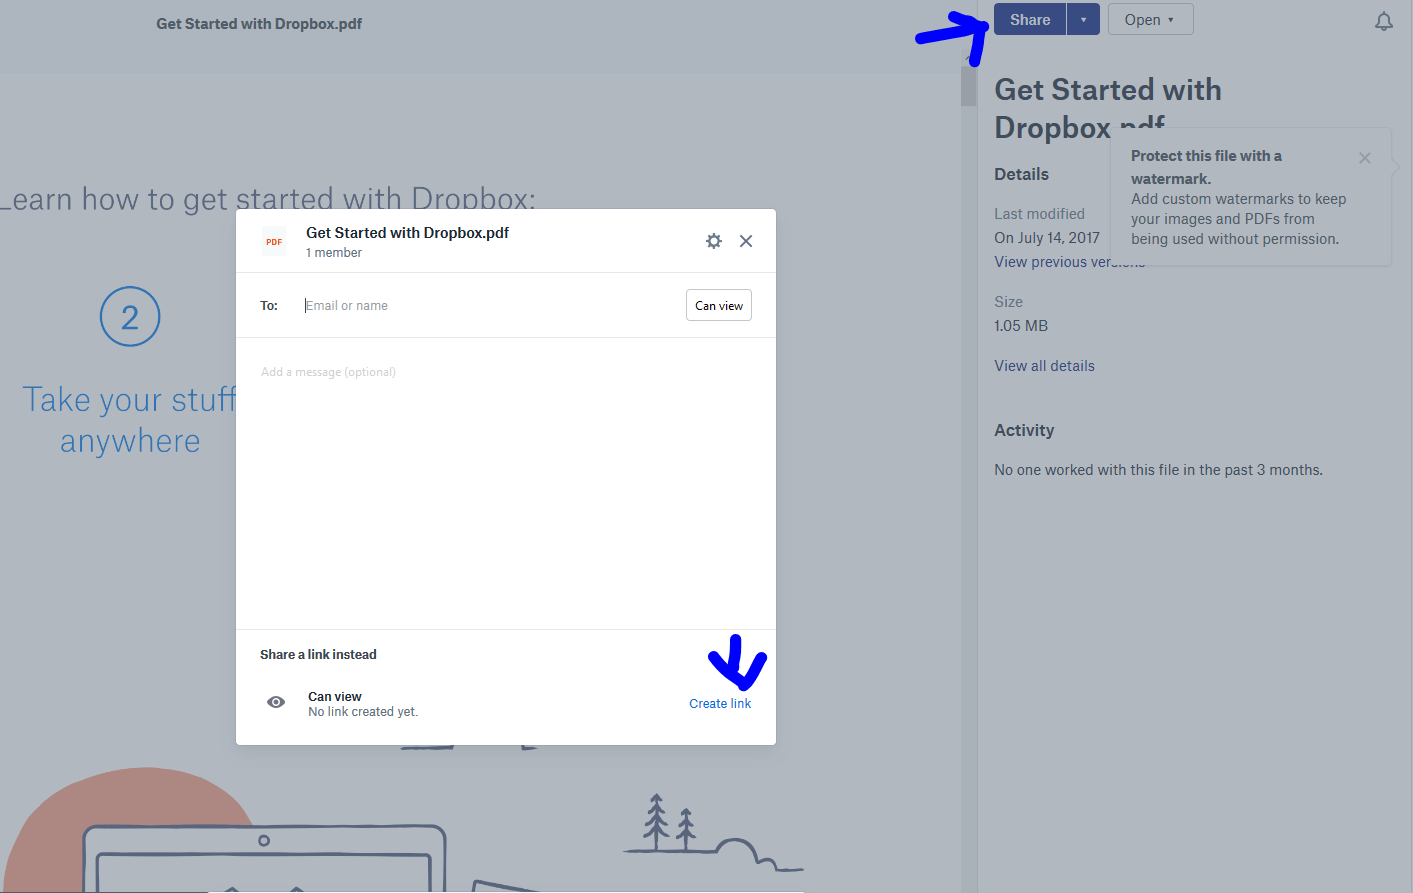
For Dropbox, you’ll want to share the file and create a public link. Then copy it for use in step 3.
Step 3: Set up a Redirect
Next up we’ll create a redirect from an easy-to-remember URL to this messy URL. A redirect is a URL that sends the user to a different URL when they visit it. Much like a forwarding address. To ensure a professional appearance and a strong brand, I prefer using a URL with your company website.
The following instructions assume your company website is built using WordPress, but if you have another method for setting up a redirect, that will work, too. These instructions will give you a general idea of what to accomplish.
First, make sure your WordPress site has a plugin installed to set up redirects. A simple and robust option is Redirection from John Godley.
Install this plugin and then navigate to Tools > Redirection in the left-hand admin menu.
From this next screen, hit “Add New” at the top to add a new redirect.
For “Source”, enter a “/” followed by everything that should come after .com or .org or whatever your website ends in. For example, you might enter “/free-gift”. If you want to brand your link to the event you’ll be at, you could do something like “/home-garden-show”.
Watch out: Whatever you enter, you’ll want to ensure it’s unique for your website or you’ll end up with conflicts. For instance, if you use “/free-gift” and you also have a page or post on your website called “Free Gift”, they might share the same URL and your redirect won’t work.
In the “URL option” box, go ahead and check “Ignore Case” and “Ignore Trailing Slash”. This ensure that “/Free-Gift” or “/free-gift/” will both also work.
For “Target URL”, paste the messy URL from Step 2 that leads directly to your file.
Change your “Group” to “Redirections”.
Click the little gear icon to expand some extra options and find where it says “with HTTP code”. Use this dropdown to select “302 – Found”. This tells your user’s browser, Google, and other bots that this redirect isn’t permanent. That way you can reuse this URL for a different PDF in the future (or an entirely different page on your website!).
When you’re done, it should look something like this:

Go ahead and click “Add Redirect” and you’re set to go! Navigate to yourwebsite.com/free-gift (or whatever URL you set up) to see your redirect in action. If you ever need to change this redirect in any way, come back to this screen to find and edit (or even delete) your redirect.
You can share your new URL with anyone and they’ll easily find your valuable PDF full of awesome information. Before you know it, you’ll have a lifelong customer.
Leave a Reply